Search This Blog

Sunday, October 26, 2014

How to Force Update to Your Moto 360

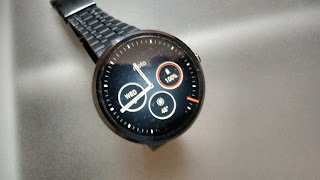
Last week, Motorola issued an update for the Moto 360 smartwatch.  The update takes the software version up to 4.4W.2 and includes many updates and improvements.  The update will be rolling out in phases to all Moto 360 watches over time.  But if you are impatient like me, here's a method you can try to force an update to your phone.

What Does 4.4W.2 Update?  First, let's see what this update does.  According to Motorola, the 4.4W.2 update makes the following improvements:

-Smart Battery Saving - When your battery hits 15%, your Moto 360 will turn off ambient mode, so you don't have to remember to.

-Timely Time Checks - Moto 360 will synchronize the time with your phone more often to make sure it up to the minute.

-User Interface Tweaks - We observed with customers that there are many times where you want to use your Moto 360 as truly a classic watch-a beautiful way to see the time.  A new gesture now lets you see the full watch face without permanently dismissing a notification.  Just touch the top of a notification and swipe down.  You'll see the notification again when you have another high priority notification.

-Mood Lighting - Moto 360 will adjust to the lighting of the room while charging, so that it isn't too bright or too dark.

-Readying the wires for Bluetooth - There are a couple of under-the-head enhancements that will pave the way for connecting Bluetooth headsets to the watch.

-Bug Squashing - As usual, bugs are squashed to enhance the overall user experience.

How to Force an Update.

Here's how I was able to force the update to be pushed to my Moto 360.  While I cannot guarantee that this will work for everyone, it did work for me.

1.  Unpair Your 360 From Your Phone - To do this go to "Settings" on your phone.  Go to "Bluetooth," find your Moto 360, click on the arrows to the right and choose "unpair."  From what I can tell, this step is key to forcing the update.

2.  Uninstall Android Wear - Go to "Settings" on your phone, then go to "Apps" and find "Android Wear."  Then just "Uninstall" Android Wear.

3. Reset Watch - Go back to your watch and go to "Settings."  Choose "Reset" and go through the process of re-pairing your watch to your phone.  

4.  Install Wear - When your watch prompts you to Install Android Wear on your phone, make sure you do that and pair your Moto 360 to your phone.  It may take a while for this process to complete so be patient.

5.  Check For Update - Once the pairing is complete, go back to your phone's "Settings," go to "About," and click on "System updates."  

That's it.  It may take a few minutes to do this but this should force the update to be pushed to your watch.  Let me know if this works for you.


Wednesday, July 9, 2014

How To Update Extensions on Chrome

Yesterday I had to update an extension on my Chrome browser.  I have a Moto X cell phone and Motorola posted an update to the Motorola Connect app on my phone.  The Motorola Connect app is a very handy feature for Motorola users only. It allows you to download an extension to your Chrome browser so that you can share your text messages on your phone with your computer and a list of your call history. You can send and receive text messages from your Chrome browser. The update refreshes the UI on the phone and the browser app and adds the ability to ring your phone from the browser extension.  This new ring your phone feature is handy if you misplaced your phone.  But in order to take advantage of the updates, you have to update the extension on your Chrome browser.  To do so is very simple.  Here's what you need to do:

-Go to the "settings" tab.
-On the left side click on "extensions."
-On the top click the box next to "Developer Mode."
-Below Developer Mode click on "Update extensions now."

That's it. Now all of your extensions are updated automatically and you are assured of having the most up to date extensions on your Chrome browser.

Hope this is helpful.

Monday, June 30, 2014

How to Set Up K9 Mail on Android Phone

If you are like me and have several email accounts, being able to unify all your incoming emails into one unified inbox makes life just a little easier.  For the past several months I have been using the Mail app from Dropbox.  I am pretty satisfied with the app and have very few complaints.  The UI of the app is a little boring, but the app is very stable and reliable. I decided to give the K9 app a try to see if it does a better job for me.  I noticed that the UI is a little nicer than the Mail UI.  Another difference between the two is that it's a little harder to add email accounts to the K9 app than it is with the Mail app.  If you are using the Mail app just add the user name and password.  With K9, if you are using a regular gmail account then you will encounter no problems.  Just type in your user name and password and the app will automatically set up your account.  But if you are like me, and have an email account associated with a paid Google Apps account, you will run into problems.  Simply including your user name and password will not work.  You have to manually configure the details in order to get the app to sync your Apps email account.  Here's what you have to do:

1.  Install the K9 app from the Google Play Store;

2.  Open the K9 app and manually set up your personal email account as the default account by simply         adding your personal email account details;

3.  Now you can add your Google Apps email account.  Start by clicking the "+" button.  Type in your full email address and password. Click "next" and choose "IMAP."  

4.  This is where it gets tricky.  Here's what you should change the settings to.

     Incoming server settings     
     Username:        Name@(Your Domain).com
     Password:        Make sure password is correct
     IMAP Server:  imap.gmail.com
     Security:          SSL/TLS (always)  
     Authentication: Plain
     Port:                993

     Outgoing server settings
     SMTP server: smtp.gmail.com
     Security:         STARTTLS (always)
     Port:               587

5.  Click next and set up your individual preferences.

And that's it.  Obviously, I only talked about Gmail accounts.  I only use Gmail accounts.  I have a couple of old Hotmail accounts and a Yahoo email account that I have synced with my personal Gmail account. I no longer use my Hotmail or Yahoo email account so I have not tried to set up those accounts on K9 so I don't know if you can even do it.

Anyway, let me know how it goes in the comments below.  I would be interested to see what you think about K9 and Mail.